Visual Basic Online Course - Analog Clock in VB6
Visual Basic Online Course - Analog Clock in VB6
 |
| Analog Clock using Visual Basic 6.0 |
Steps to create an Analog Clock
In Visual Basic 6.0
Introduction
Which level would read this?
Creating Digital Clock using Visual Basic 6.0 is easy, you only need a timer and a textbox or label to accomplish this, actually creating personal calendar & time are so easy. But Analog Clocks are not that easy for a Visual Basic beginner, but is a good example to start moving from being a beginner to professional.
Logic
How does it work?
We all have Analog Clocks in our houses or even wear one in our right hand, and we know that it refers to time and some of them show (Day, Month, Year) too, but we are not here to discuss how the timing system work, only the Analog Clock. The Analog Clock has 3 indicators or hands (Seconds, Minutes, Hours) and they don't just spin in circles, they TICK.
The indicator/hand of Seconds ticks 60 tick in order to cause 1 tick to the indicator/hand of the Minutes, and each 60 ticks of the indicator/hand of Minutes cause 1 tick to the indicator/hand of Hours.So, we have an equation which is :
1 hour=60 minutes
1 minute=60 seconds
1 second=1 tick of the Visual Basic Timer Control.
1 minute=60 seconds
1 second=1 tick of the Visual Basic Timer Control.
Project Design
How to design an Analog Clock for Visual Basic 6.0 ?
Yes, designing for VB6 is different from designing for VB.Net. We will need a photo of an Analog Clock, you can use Google search to download Analog Clock.JPEG or just download one of those Photos :
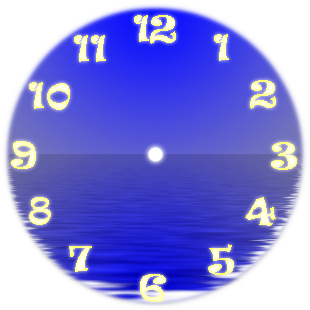 | 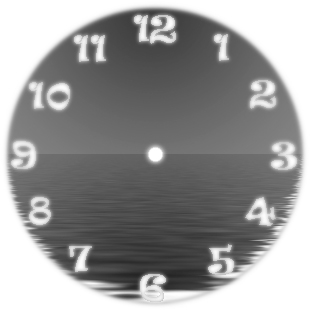 | 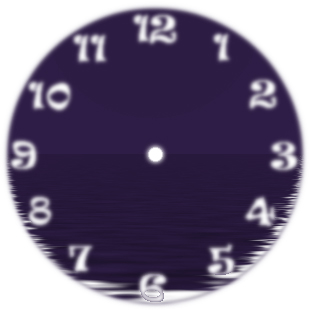 | 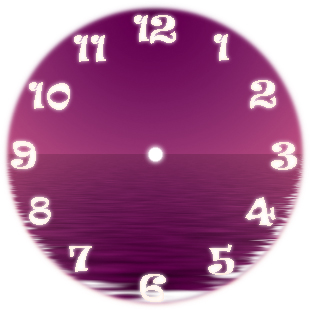 |
Or you can design one like this :
1) Using any painting application (PhotoShop or Paint) create a circle with 12 signs represent the 12 hours (1, 2, 3, ... 12) and make sure that your photo's dimensions are equal (Square) I.e 300x300 px in order to fit the form's dimensions.
2) Save your photo as JPEG format as by default Visual Basic 6.0 doesn't work with PNGs or GIFs.
3) Include your photo in your application's main folder.
4) Open Visual Basic 6.0 and Create New Project.
5) Make sure your form's dimension are equal and that you are using Twips as ScaleMode and Set AutoDraw to True.
6) Set the Photo property as your photo in your main folder.
7) Place a new PictureBox control on your form in the middle of it and a Label control.
How it works ...
>How do the Clock hands go round in circles ?
The circle (Clock face) is a circle with (12) numbers, this circle is divided into 360 degrees (even units) with 0 degree at 3 O'clock and 90 degrees at 12 O'clock, and the movement on the form (Circle) starts from PointF at the upper-left corner where X increase as we move to the right and Y increases as we move to the down. See Shape (1) & Shape (2) for details.
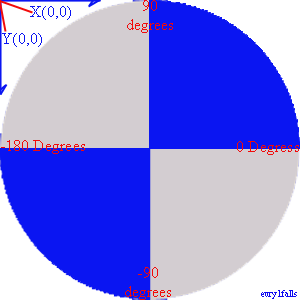
Shape (1)
Shape (2)
- Best way to understand a circle is when you know that circles are drawn according to the square within, meaning that when you draw a square shape then you be sure that the elliptic shape surrounds the square that touches the 4 corners or this square is an even circle with even 360 units called degrees. See shape (3).

Shape (3) - Square shape within an elliptic shape (Circle) touches it in the 4 corners.
- Now, when we want to know the central point where the 3 hands (Hours Hand, Minutes Hand and Seconds Hand) will spin around, then we will need to specify the central point "PointF" (X,Y) in the very middle of the circle, which will be also the center of the square shape within, and as long as our form will be a square shape (Width=Height) then it's easy to calculate the position of this point.
- Now, we want to draw 3 hands starting from this PointF and the 3 hands have different length (Seconds Hand is the tallest, Hours Hand is the shortest). Unless you know how to centralize the 3 hands on the form, we won't be drawing these hands at the Design Time (IDE). To draw a line you need to know its length. PointF (X,Y) is the start Point of drawing while PointE (X,Y) is the end point of drawing.
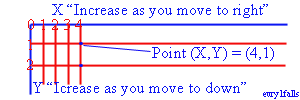
Line.Length=PointF to PointE , so according to shape (2), if I want to draw a line with length 500 Pixels then I need to set the PointF to PointE=500 like this Me.Line (0,0)-(500,500), VbRed , that means that I will draw a line from the Point (0,0) to the Point(500,500), if my form is 500Px then I will be drawing a line from the upper-left corner PointF to the lower-right corner PointE, see Shape (4).
Line.Length=PointF to PointE , so according to shape (2), if I want to draw a line with length 500 Pixels then I need to set the PointF to PointE=500 like this Me.Line (0,0)-(500,500), VbRed , that means that I will draw a line from the Point (0,0) to the Point(500,500), if my form is 500Px then I will be drawing a line from the upper-left corner PointF to the lower-right corner PointE, see Shape (4).

Shape (4) - X,Y understanding
- In our example the form is a circle, but the form has even coordinates (4650 X 4650) twips while 4650 twips=310 Pixels ( * To convert twips to pixels we use 4650 / 15).
Naturally our Radius (R) is (4650/2)=2325 Twips (155 Pixels). In order to draw a circle on a form with 2325 Twips Radius, then our code is as following and is a part of the application project example of course. If you applied this code to a new Visual Basic 6.0 project then you will get a Round Shaped Form, but you will see it better if you set the Picture property of the form to a 310X310 Pixels JPG Picture and set the BorderStyle property of the form to=0 - None :
Naturally our Radius (R) is (4650/2)=2325 Twips (155 Pixels). In order to draw a circle on a form with 2325 Twips Radius, then our code is as following and is a part of the application project example of course. If you applied this code to a new Visual Basic 6.0 project then you will get a Round Shaped Form, but you will see it better if you set the Picture property of the form to a 310X310 Pixels JPG Picture and set the BorderStyle property of the form to=0 - None :

Shape (5) - Drawing line on the form 'Green line'
- The picture in Shape (5) shows how is it done to draw a line from PointF(X1,Y1) to PointE(X2,Y2) or from (2325,2325) to (1500,1500) using Twips as the measuring unit and how twip points are placed on a Visual Basic form of a size of (4650 X 4650) twips. Remember that we started drawing from the center point until we reached (1500X1500) the PointE.
- The Size of this line When you measure, it will be (825 Twips from doing 2325-1500). Why the line is leaning and not straight ?
The answer is : Because of its Angle
The answer is : Because of its Angle
-What is a line's Angle ?
- Angle generally is that figure  or is the figure formed when 2 rays meet in one point, while the 2 rays are called the Angle Sides. Angle is measured by the Degree(s) like that symbol º, for example (90º ). How to use Angles in Visual Basic drawing lines on the form.
It is confusing because we only have one line and we want to make an Angle for it, and notice that the line slopes.
or is the figure formed when 2 rays meet in one point, while the 2 rays are called the Angle Sides. Angle is measured by the Degree(s) like that symbol º, for example (90º ). How to use Angles in Visual Basic drawing lines on the form.It is confusing because we only have one line and we want to make an Angle for it, and notice that the line slopes.
How to determine the Angle of a line drawn in Visual Basic 6.0 ?
We don't have a protractor but we have this :
60 seconds and minutes ticks within a circle [Seconds & Minutes hand]
12 Hours ticks [Hour hand]
60 seconds and minutes ticks within a circle [Seconds & Minutes hand]
12 Hours ticks [Hour hand]
Each tick represents an even angle, so we have :
59 angles to create a minute
59 angles to create an hour
23 angles to create a day
59 angles to create a minute
59 angles to create an hour
23 angles to create a day
Source Code
You can always download the source code from the bottom of the page.
But, study the code well and try to make changes to it, I will make it more flexible to use in another update soon.
Download Link
The file has been tested for virus infection.The file (Analog Clock with Visual Basic 6.rar) contains these files :
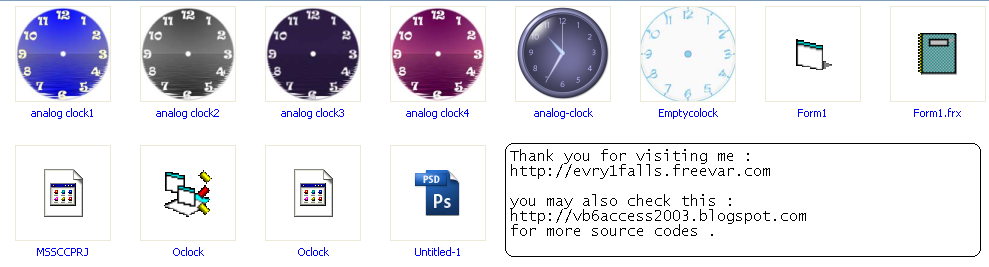
File is hosted for free on Mediafire.com, file (Analog Clock with Visual Basic 6.rar) - download
♥ Visual Basic 6.0 Course Online :
- Automate MS-Access Database in Visual Basic 6.0 though a network
- Visual Basic 6.0 Analog Clock
- Visual Basic 6.0 Temperature Convertor
- Visual Basic 6.0, MS-Access 2003 and Crystal Reports - Phone book
- Visual Basic 6.0, MS-Access 2003 Database and DataGridView
- Visual Basic 6.0 FTP full application source code
- Visual Basic 6.0 Color Picker tool source code
- Visual Basic 6.0 TreeView Control lesson (Part1 - Part 2 - Part3 - Part4 - Part5) Arabic.
- Visual Basic 6.0 - Introduction to Graphics (Part1 - Part2 - Part3)
- Visual Basic 6.0 and MS-Excel 2003 tutorials (Part1 - Part2 - Part3 - Part4 - Part5 - Part6)